I know you wasted a lot of money on Facebook ads, but why because you did not set conversion tracking on Facebook ads, if you set that thing up first you save 50% of your money.
Your question is how? Because you set up conversion tracking, you can track your audience data, track that, and create a game-changer marketing strategy.
Today, I’ll provide you with a step-by-step guide on how to set conversion tracking in your Facebook ads and save 50% and more money.
Before setting up conversion tracking you have to set up first pixels.
But what are pixels? That is peace of code which helps to track your audience interaction on your website.
Facebook Pixels How To Setup
First, you have to log in to your Facebook business manager I hope you have already a business manager account.
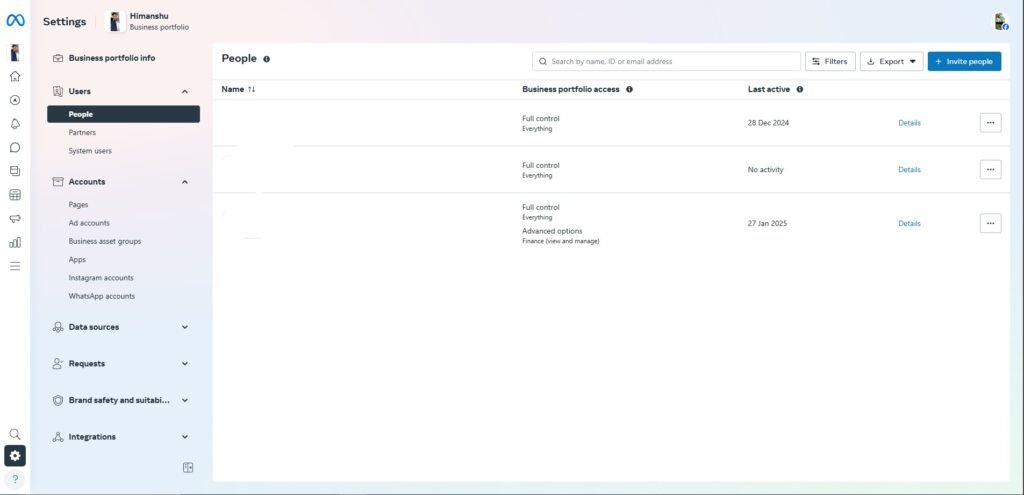
If your business suit is open you can click on the settings icon and open your business manager simply.
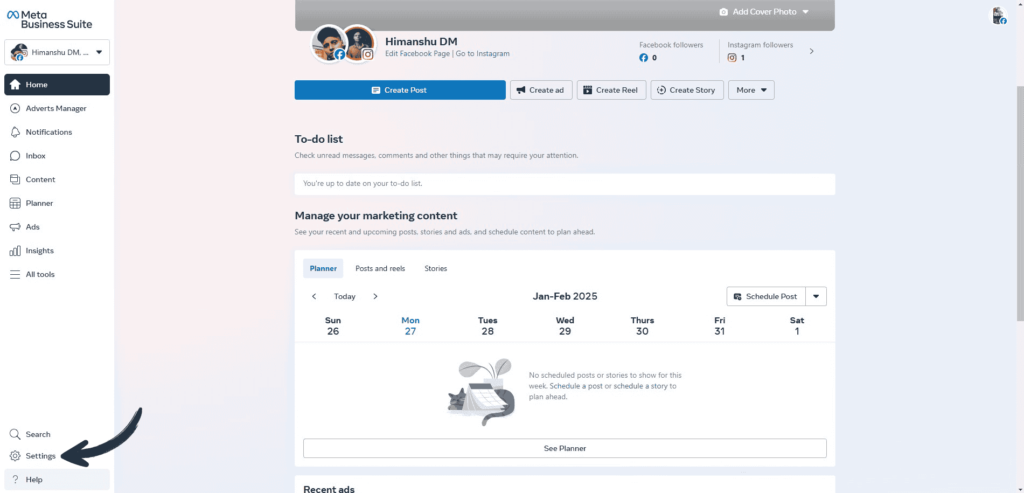
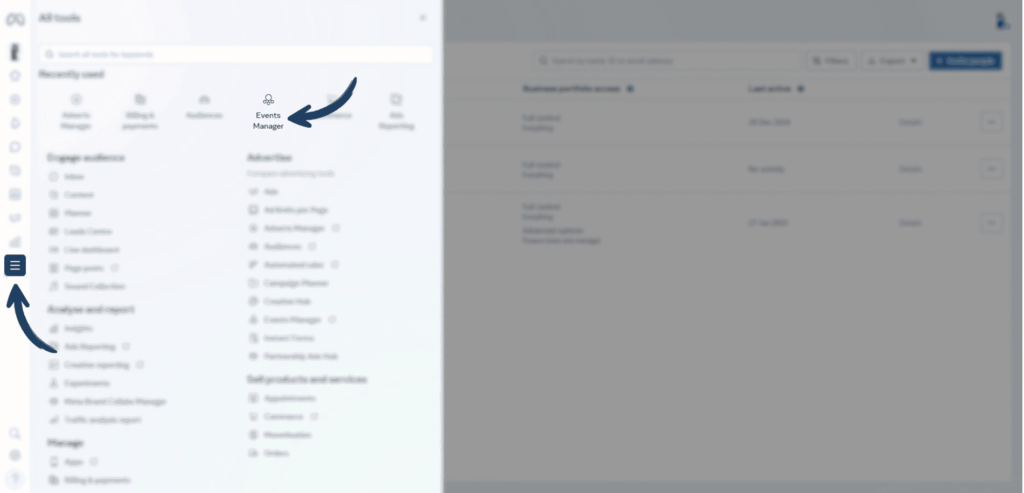
After clicking you will land on the business manager playground, click on the All tools option and select Event Manager.
Click on Connect data sources from the bar

After clicking you show a popup on your screen
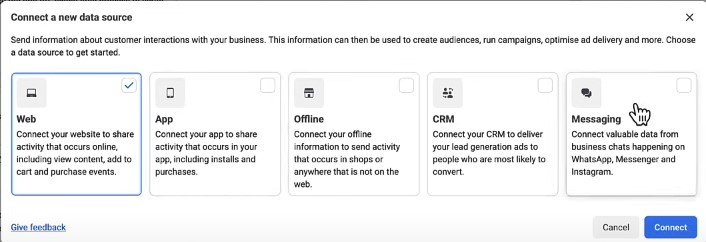
Select Web, because we are set a pixel on a website and click on connect button.
You show a popup on your screen Create a new dataset you can keep any name that is only for your reference click on Ok .
Enter your Website URL, and which website you want to set the pixel to Click on Check and click on the next button.
Let’s find a setup method click on the do-it-yourself option and click the next button.
You have shown options Choose how to connect your website, and click on meta pixel only click on the next button.
Click on the install code manually you show javascript code
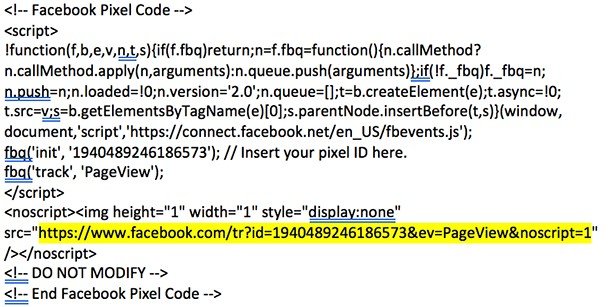
you can paste on your website header section if your website on wordpress you can use plugin for this PixelYourSite Paste your pixels ID for Example I highlight on yellow color this is pixels ID 1940489246186573 and paste here
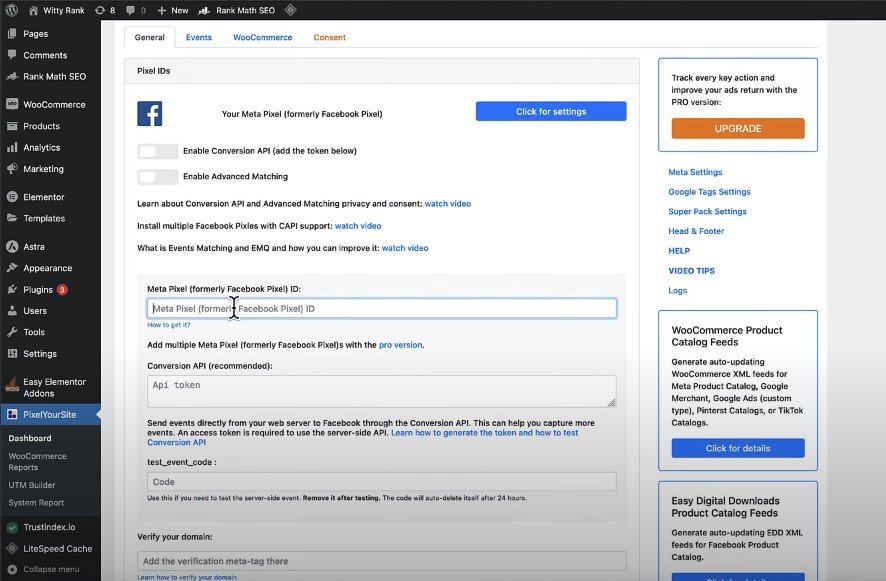
Paste your meta pixels ID
back to the event magner click on continue and if nothing changes click on again continue and click Go to Pixels Overviews.
Your integration successfully
Click your integration and use the Meta Pixel Helper Chrome extension if your extension shows the green light with the number it means your pixels work properly.
Your pixels setup properly with your website feature step is more easy
Custom Conversion tracking facebook How setup
First, understand how conversion tracking works when any user comes on your website and takes action for example if you have a registration form on your website after submitting it the user redirects to the thank page which means the number on time land user thanks page 1 Conversion will be counted.
Same above land on event manger and click on Custom conversion and click on Create Custom Conversion button
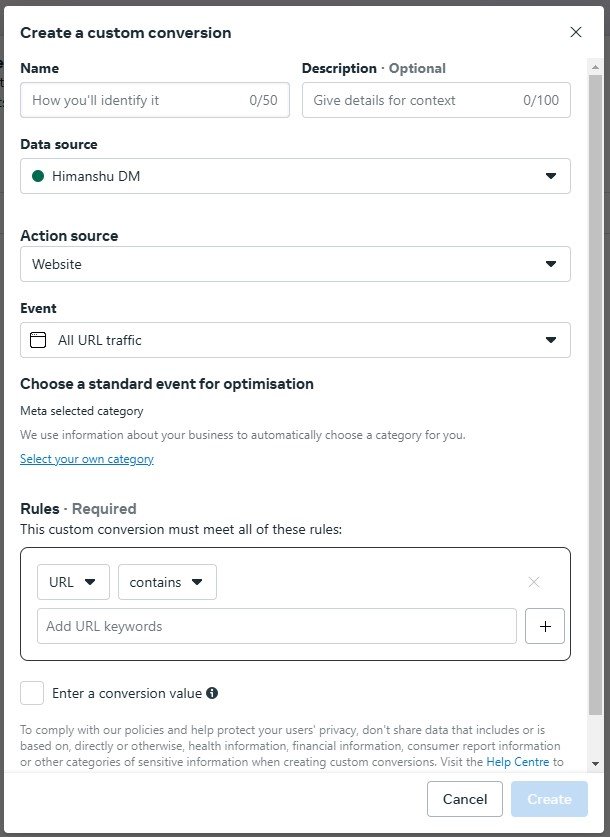
This time to create custom conversion
- Name: Enter your conversion for your reference only.
- Description: optional short note for your conversion.
- Data source: select the data source that you created recently.
- Event: Select all URL traffic
- rules: URL, Equale, Add your thanks page URL, you can add any URL with URL count conversation.
Click on create
Your conversation is created when any user submits your register form and lands the thanks page then 1 conversion count congratulations you can track your conversion.
Conclusion
This example I have provided you submit form you can use conversion tracking from your way this is only an example.
If you want more traffic on your website so check out my digital marketing services.

